Summary
- iPads can be utilized for various tasks like personal use, work, and gaming, making them ultra-versatile.
- iPadOS allows for setting up a virtual trackpad to enhance navigation on the screen.
- Virtual trackpad gestures can help with text selection, scrolling, app switching, and more on an iPad.
There are a lot of features about the iPad and Apple products in general that are carefully considered before being included. Fans are always clamoring for better battery life or a better processor to handle all the tasks that are open to iPads. While it seems like Apple is steering clear of a foldable iPad, the newest version of the staple device is set to be a new iPad Pro with an M5 chip.
But, if you have an iPad now, you know how useful it is. There are hundreds of things you can do on it, from work and personal use all the way to gaming. You can even add a keyboard to it and turn it into a mini laptop. But in order to get the full experience of a MacBook, you need more than just a keyboard.
Despite having a touchscreen, there are uses for a trackpad on an iPad. While one is not visible in plain sight, you can pull one out from the depths of iPadOS. Here’s how and why you should.
- Brand
-
Apple
- Storage
-
256GB, 512GB, 1TB, 2TB
- CPU
-
M4
- Operating System
-
iPadOS
- Ports
-
Thunderbolt 3
- Display type
-
Ultra Retina XDR display (OLED)
How to set up a trackpad on an iPad
It just takes a few steps
Virtual trackpad has been an option in iPadOS since March 2020 when iPadOS 13.4 was released.
There are features hidden deep inside iPadOS that you can bring out if you dig. The AssistiveTouch menu is one of the more valuable features that you can set up and use more frequently. This makes it easier to get to different features of your iPad without having to go through a number of menus each time. You can pin certain tasks to the AssistiveTouch menu and use them as shortcuts to move around the device.
Coincidentally, one of those is the virtual trackpad, which lets you move around the screen more easily. You can get even more in-depth with it by assigning different gestures, similar to how you can on a MacBook. But to set up the trackpad to begin with, you have to open Settings.
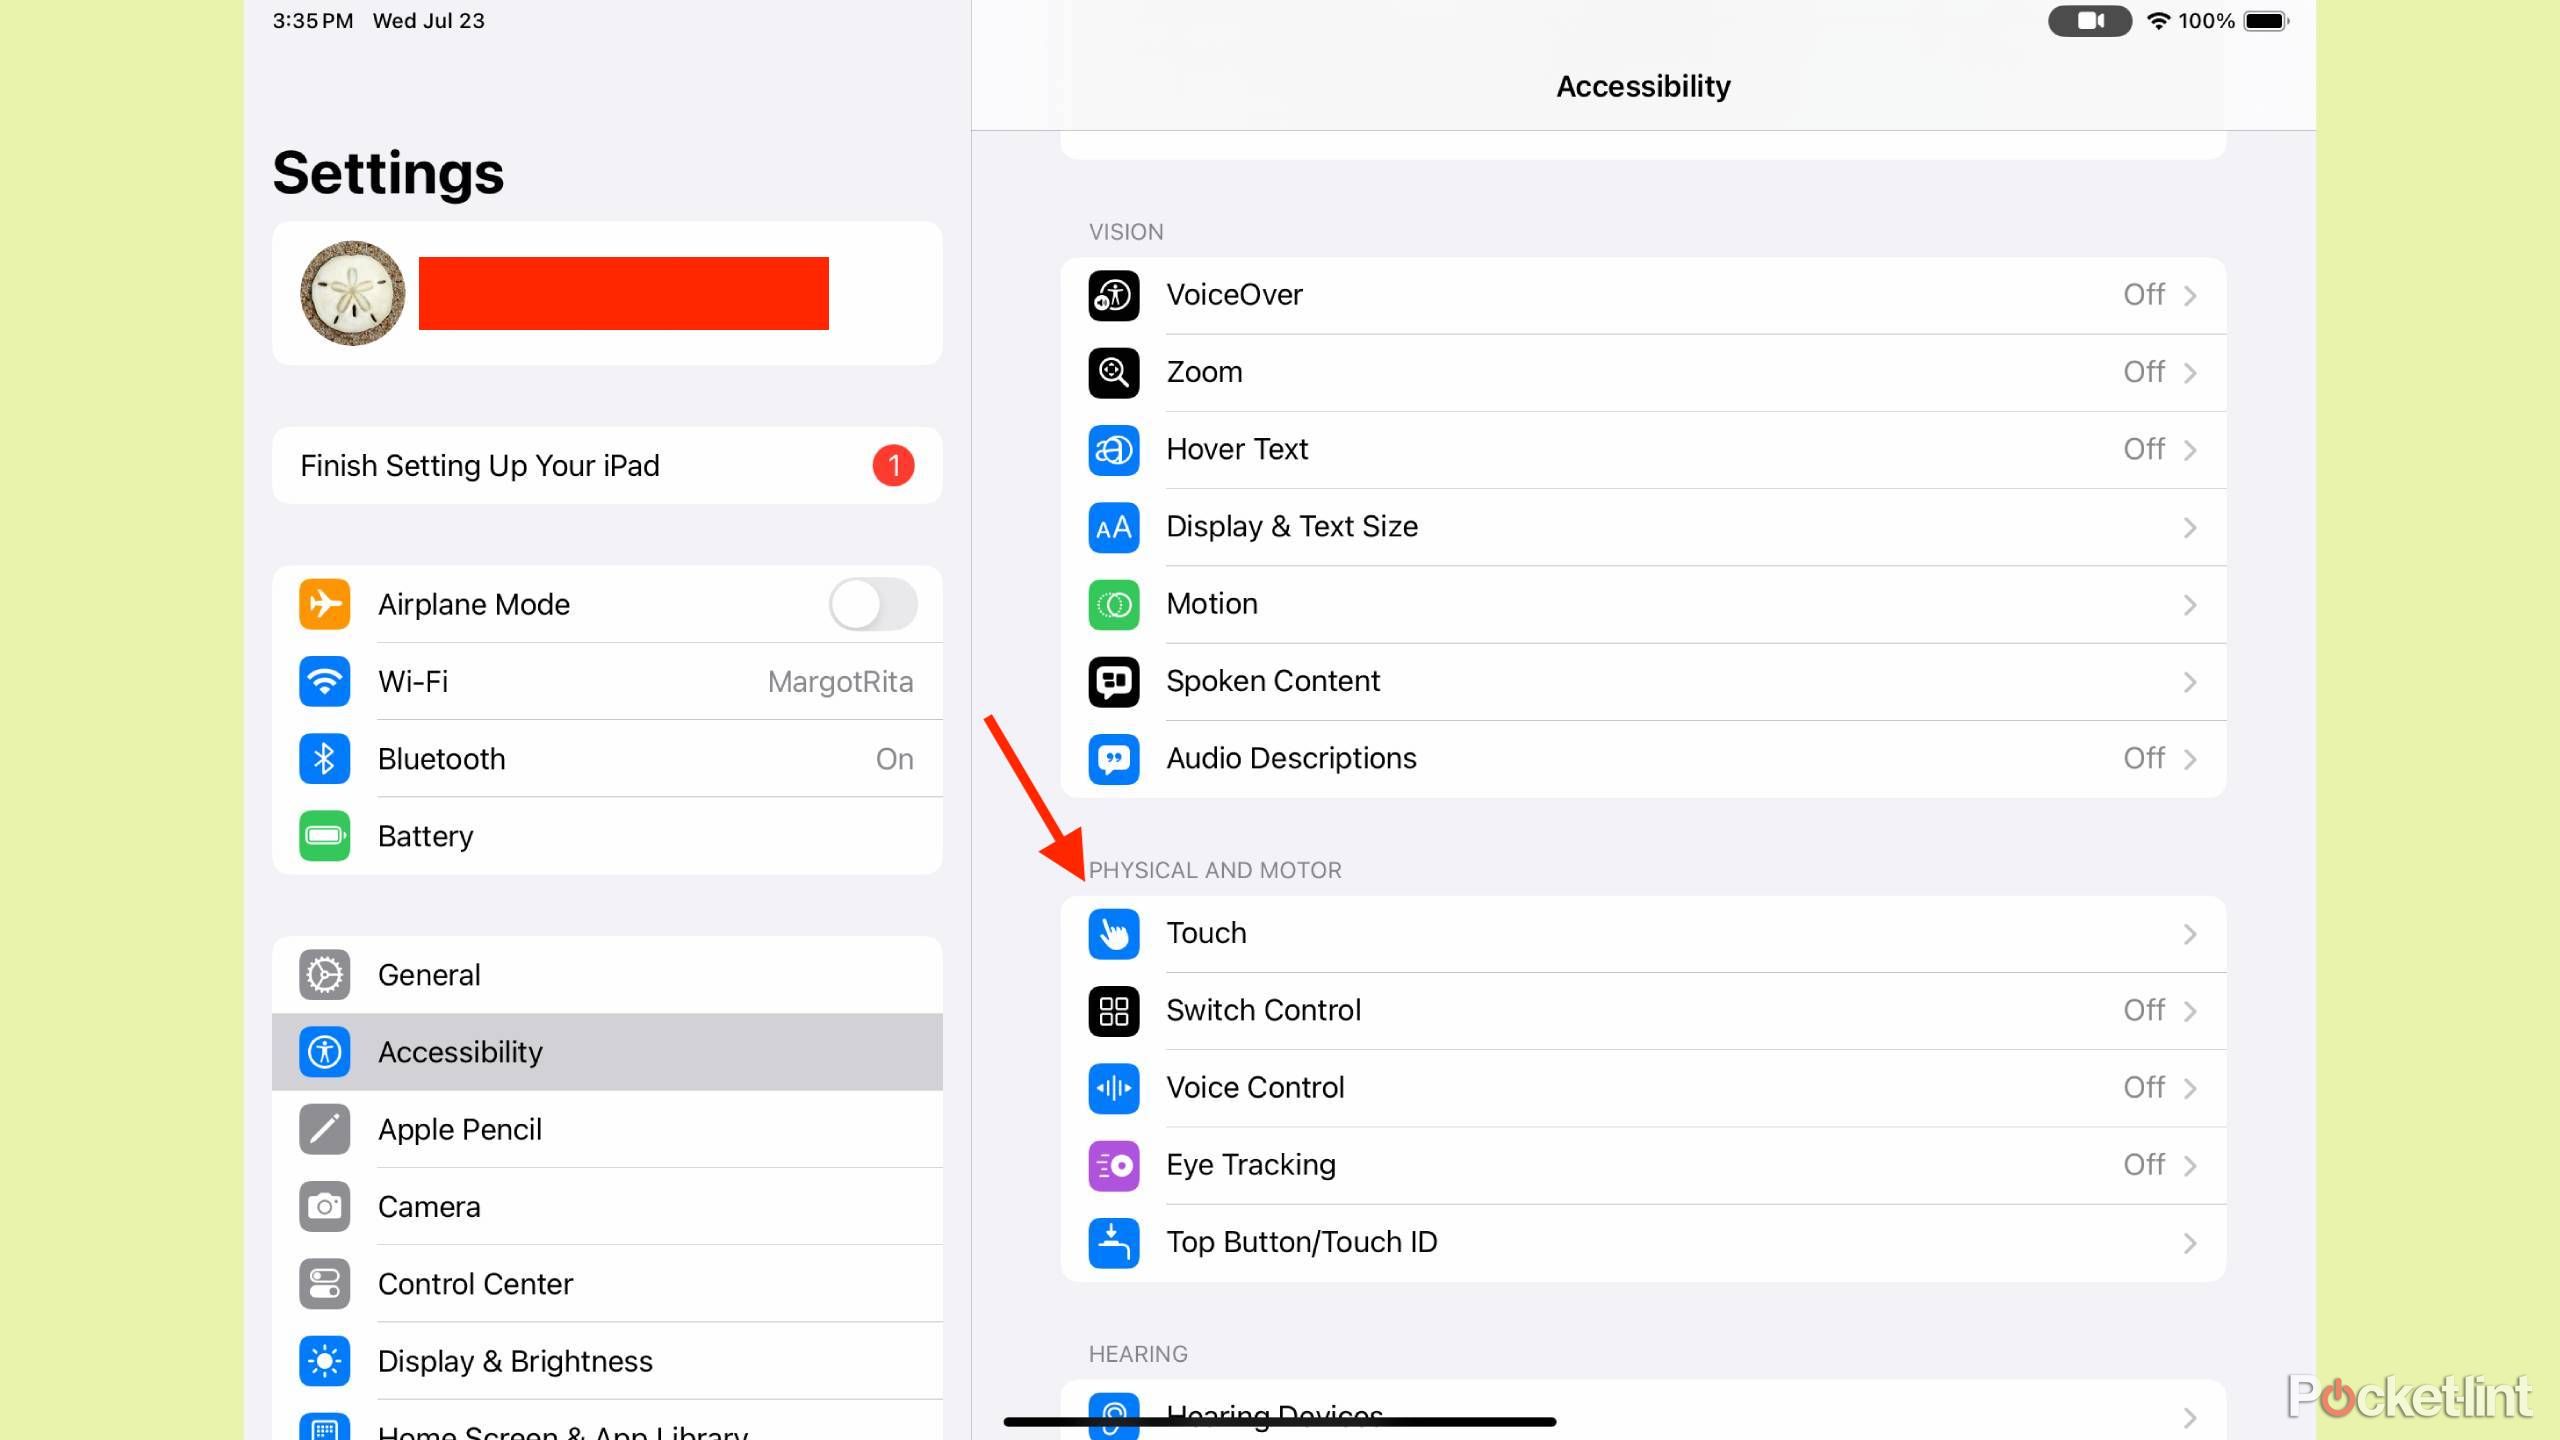
- Open Settings.
- Tap Accessibility.
- Tap Touch.
- Tap AssistiveTouch and toggle it on.
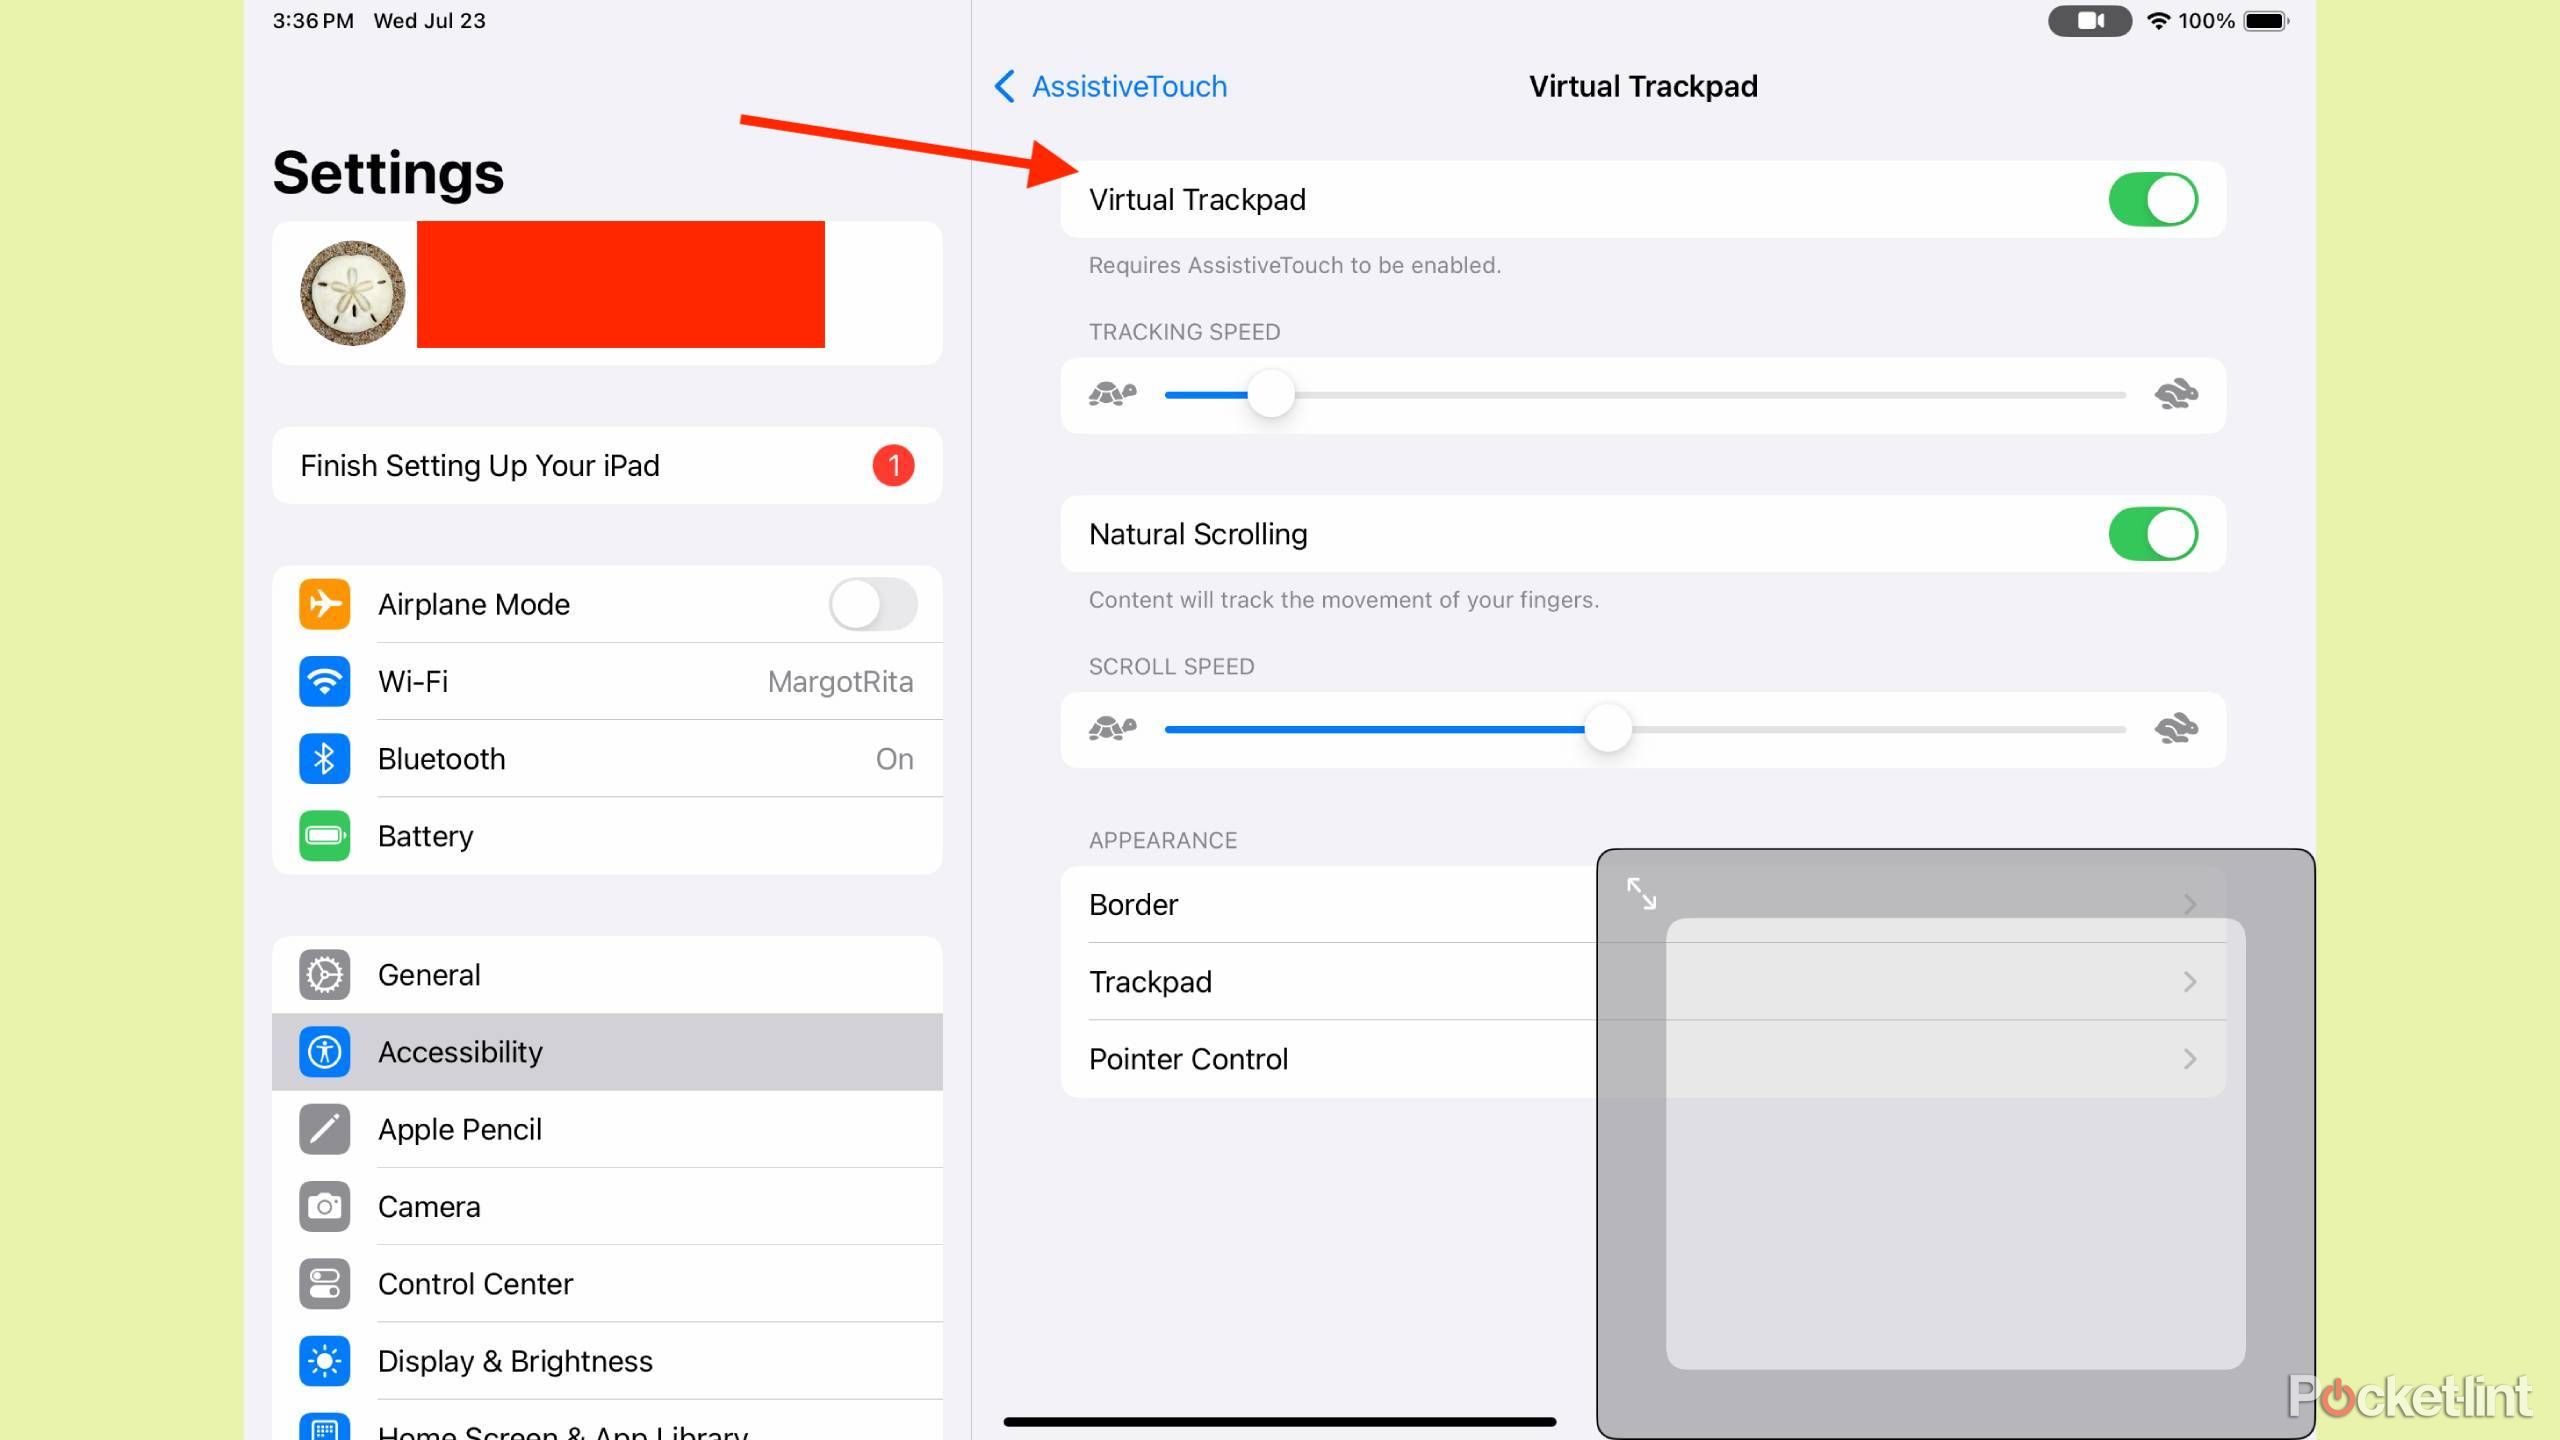
- At the bottom of the AssistiveTouch menu, tap Virtual Trackpad.
- Toggle on Virtual Trackpad.
Once you do that, the Virtual Trackpad will appear on your screen. You can move it around or expand it as you see fit by enhancing the size with two fingers spreading apart. In order to get more out of it, you need to configure it.
Get more out of your trackpad
Set it to handle all kinds of tasks
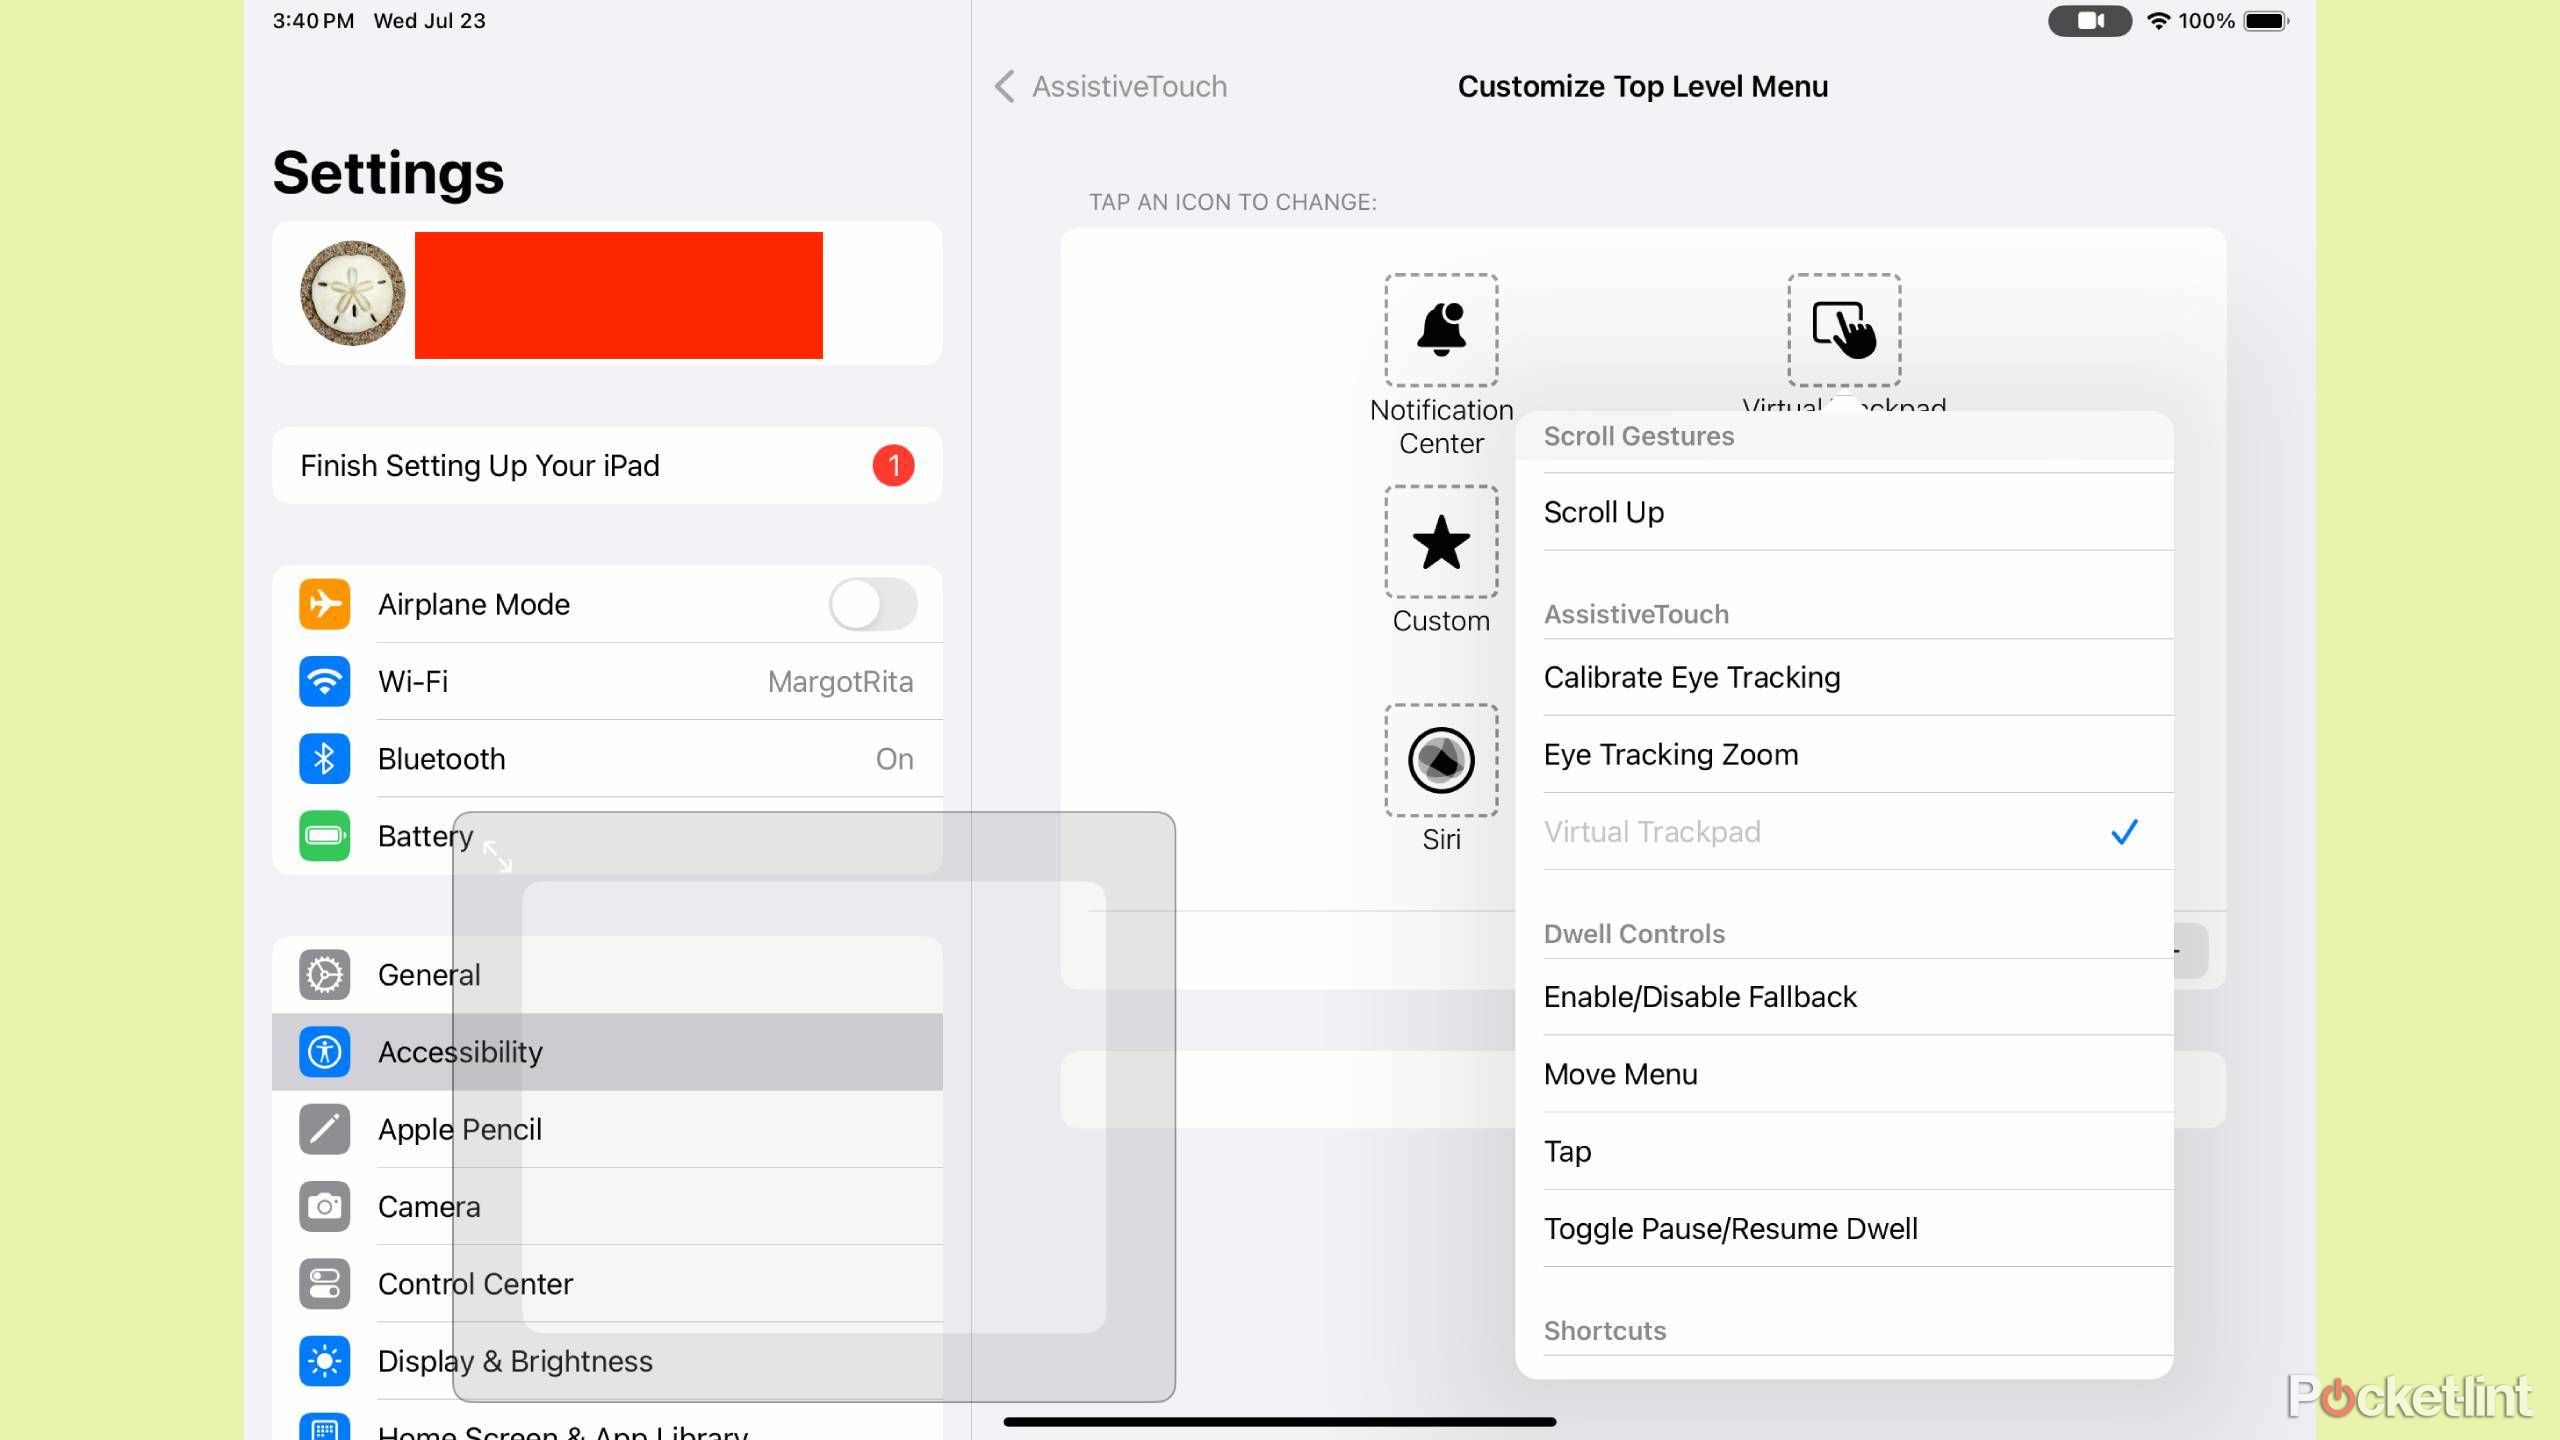
You can access your trackpad by tapping the AssistiveTouch button (the small circle that is now present on your iPad screen at all times.) This will bring up a menu that shows all of your shortcuts that you’ve set. If you click the + button at the bottom, you’ll be able to add the virtual trackpad as one of the options for the AssistiveTouch menu. If you want to change the settings of the other things that show up on the AssistiveTouch menu, you can do so in the same Settings menu.
You can pin certain tasks to the AssistiveTouch menu and use them as shortcuts to move around the device.
Once you have the virtual trackpad up on your screen, you can move your finger along it and a cursor will move across the screen. It basically acts as if the touchscreen itself isn’t working, and you can’t tap on the icons individually. But, with the trackpad, if you move your finger across it and land on an icon, you can single tap it to open it.
More gestures that it can do include:
- Single tap, hold, and drag — highlight text or select an icon and drag and move it
- Two-finger swipe up and down or left and right — scroll up and down or left and right
- Four-finger full swipe up — go Home
- Two-finger swipe down while on Home Screen — open Spotlight Search
- Two-finger pinch in or out — zoom in and out
How I’ve utilized the virtual trackpad on my iPad
It’s more useful than you might think
It’s not just meant to be used when your touchscreen isn’t working well — if you don’t have a stylus or Apple Pencil to use, it can be difficult to move your fingers all around the iPad screen for more extensive work. If I’m trying to access things that are in different corners of the screen, it can be nearly impossible to have my fingers spread across two different places. But on the virtual trackpad, it’s much easier to touch, drag, and highlight different things because I’m just working in a smaller space.
Another big plus is that I can position the virtual trackpad wherever I want on the screen. I can move it left, right, up, and down to avoid whatever I’m trying to work on. This gives me an unobstructed view, so I can see what I’m doing on the screen and the trackpad at the same time. Using the gestures lets me switch between apps rather than minimizing one and opening up the other. It also lets me highlight text on screen and have the iPad function more like a MacBook.
The beauty of enabling the virtual trackpad is not having to pay for a Magic Keyboard or an external Touchpad but getting the same effects as one. It’s worth trying out if you’re interested in getting more out of your iPad.


