Your PC’s antivirus software might be able to tackle malware, but some infections require more powerful solutions. If you’re dealing with a nasty malware infection that you just can’t shift, a USB drive might just save the day.
5
Use Specialized Antimalware Programs
If you can still boot into your OS and use your PC, you can try using specialized antimalware programs to remove malware from your PC. Depending on the malware, this may or may not fix the problem. However, considering the amount of effort other malware removal methods require, this is worth a try.
I recommend you start with Malwarebytes. It works a lot like regular antivirus software and has one of the best malware detection rates among several antivirus tools that I’ve tested. Malwarebytes also offers additional features such as a personal data remover, scam protection, adware removal, digital footprint scan, and even a VPN, among others.
If you’re using Windows, the Windows Malicious Software Removal Tool (MSRT) is also worth a shot. It’s a lightweight tool bundled into monthly Windows security updates, but it can be downloaded as a standalone program as well. It finds malware, removes it, and attempts to undo any changes made to your system.
MSRT does not, however, replace a traditional antivirus tool. It’s meant more as a complementary tool to find and remove known malware families. If you want stronger antimalware protection, the Microsoft Safety Scanner is also a good option.
Last but not least, you can also try UsbFix, especially if you suspect the malware might be residing on a USB or external storage drive. UsbFix performs a quick scan every time your computer starts up and protects your USB drives in real time.
You’ll want to run these scans a few times to make sure they pick up and clean any nasty malware from your system. Some malware is stealthier than others and requires more effort to shift.
4
Use a Bootable Rescue USB
Now, if you can’t boot your PC up properly, or want to avoid booting it up to protect against data theft and other malware-related issues, you can attempt to clean it using a USB drive.
One way of getting rid of malware on your PC is to use a bootable rescue USB to recover your OS to a point before it was infected with malware. This is one of the reasons why I always keep a recovery USB handy, and you should too.
In case your OS is compromised by malware, chances are antivirus or antimalware solutions won’t be able to root out the malware completely. Even if they do, there’s no way of being certain that the malware has been removed. Hackers often build persistence mechanisms in malicious software that bring it back to life after being removed.
Think of your bootable rescue USB as a digital paramedic kit. Bad malware infections can take over your system, block your regular antivirus, or even prevent your OS from starting in the first place. In such cases, you can use a bootable USB to boot outside of the infected environment.
This means that the malware can’t interfere with the cleaning process as it runs even before your OS does. The scanning and cleaning process can take a while, especially if you have a large amount of data on your storage drives. This is largely because these scans are more thorough than your regular antivirus scans.
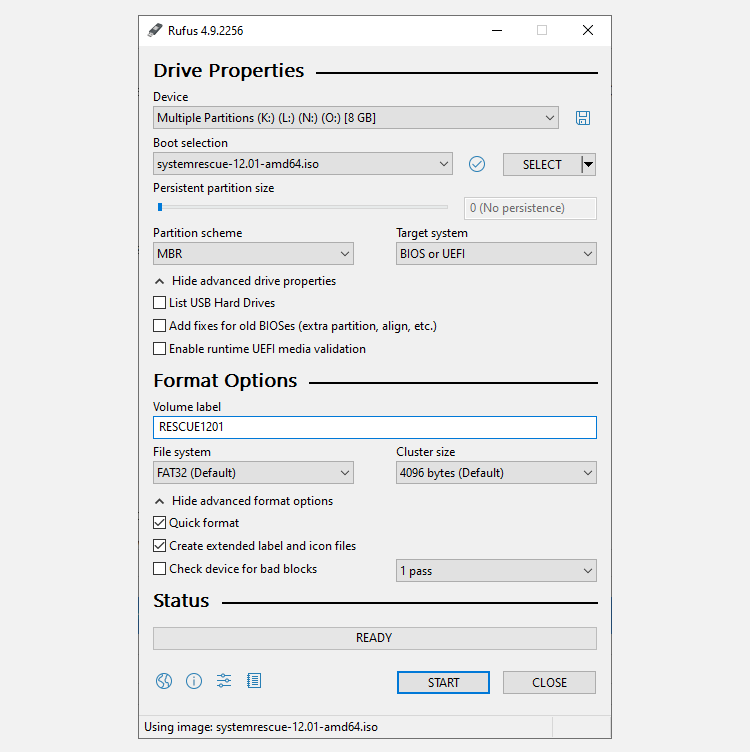
Making a rescue USB isn’t hard either. My preferred option to use is SystemRescue, which provides an ISO file you can use to create a bootable USB using Rufus (an ISO to USB tool).
- Download and Install Rufus.
- Under Boot selection, click the SELECT button to select your SystemRescue ISO file.
- Under Partition scheme, select MBR from the dropdown.
- Under Target system, select BIOS or UEFI.
- Check the Volume label field next; it should read RESCUEXXXX. The Xs represent the version number of the ISO file you downloaded.
- Set the File system to FAT32. You can leave the Cluster size setting to its default value.
- Click the Start button to create the bootable drive.
Once your bootable rescue USB is ready, you can boot into the temporary environment using the drive and use the antimalware or antivirus tool of your choice to remove malware infections. Alternatively, if you’re planning on nuking the drive, you can also use the rescue USB to extract any important data.
How to Boot From a USB Drive on Windows
Now that you know how to make the USB drive, you can boot from it to begin cleaning out the malware. With the computer turned off and the bootable USB inserted, start up your computer and repeatedly press the BIOS/ UEFI access key. The key could be ESC, F1, F2, F8, or F10, but it varies between manufacturers.
If you don’t want to use a rescue USB drive or simply don’t have one on hand, several standalone USB malware removal tools can help you in a pinch. These are lightweight, standalone tools that can be run from an external drive or bootable USB drive and scan your storage drive for malware.
Two of the best free tools you can use for this are:
- Emisoft Emergency Kit: A free portable, dual-engine cleaning toolkit that can find and remove malware and potentially unwanted programs from your PC. Best used alongside other antivirus software.
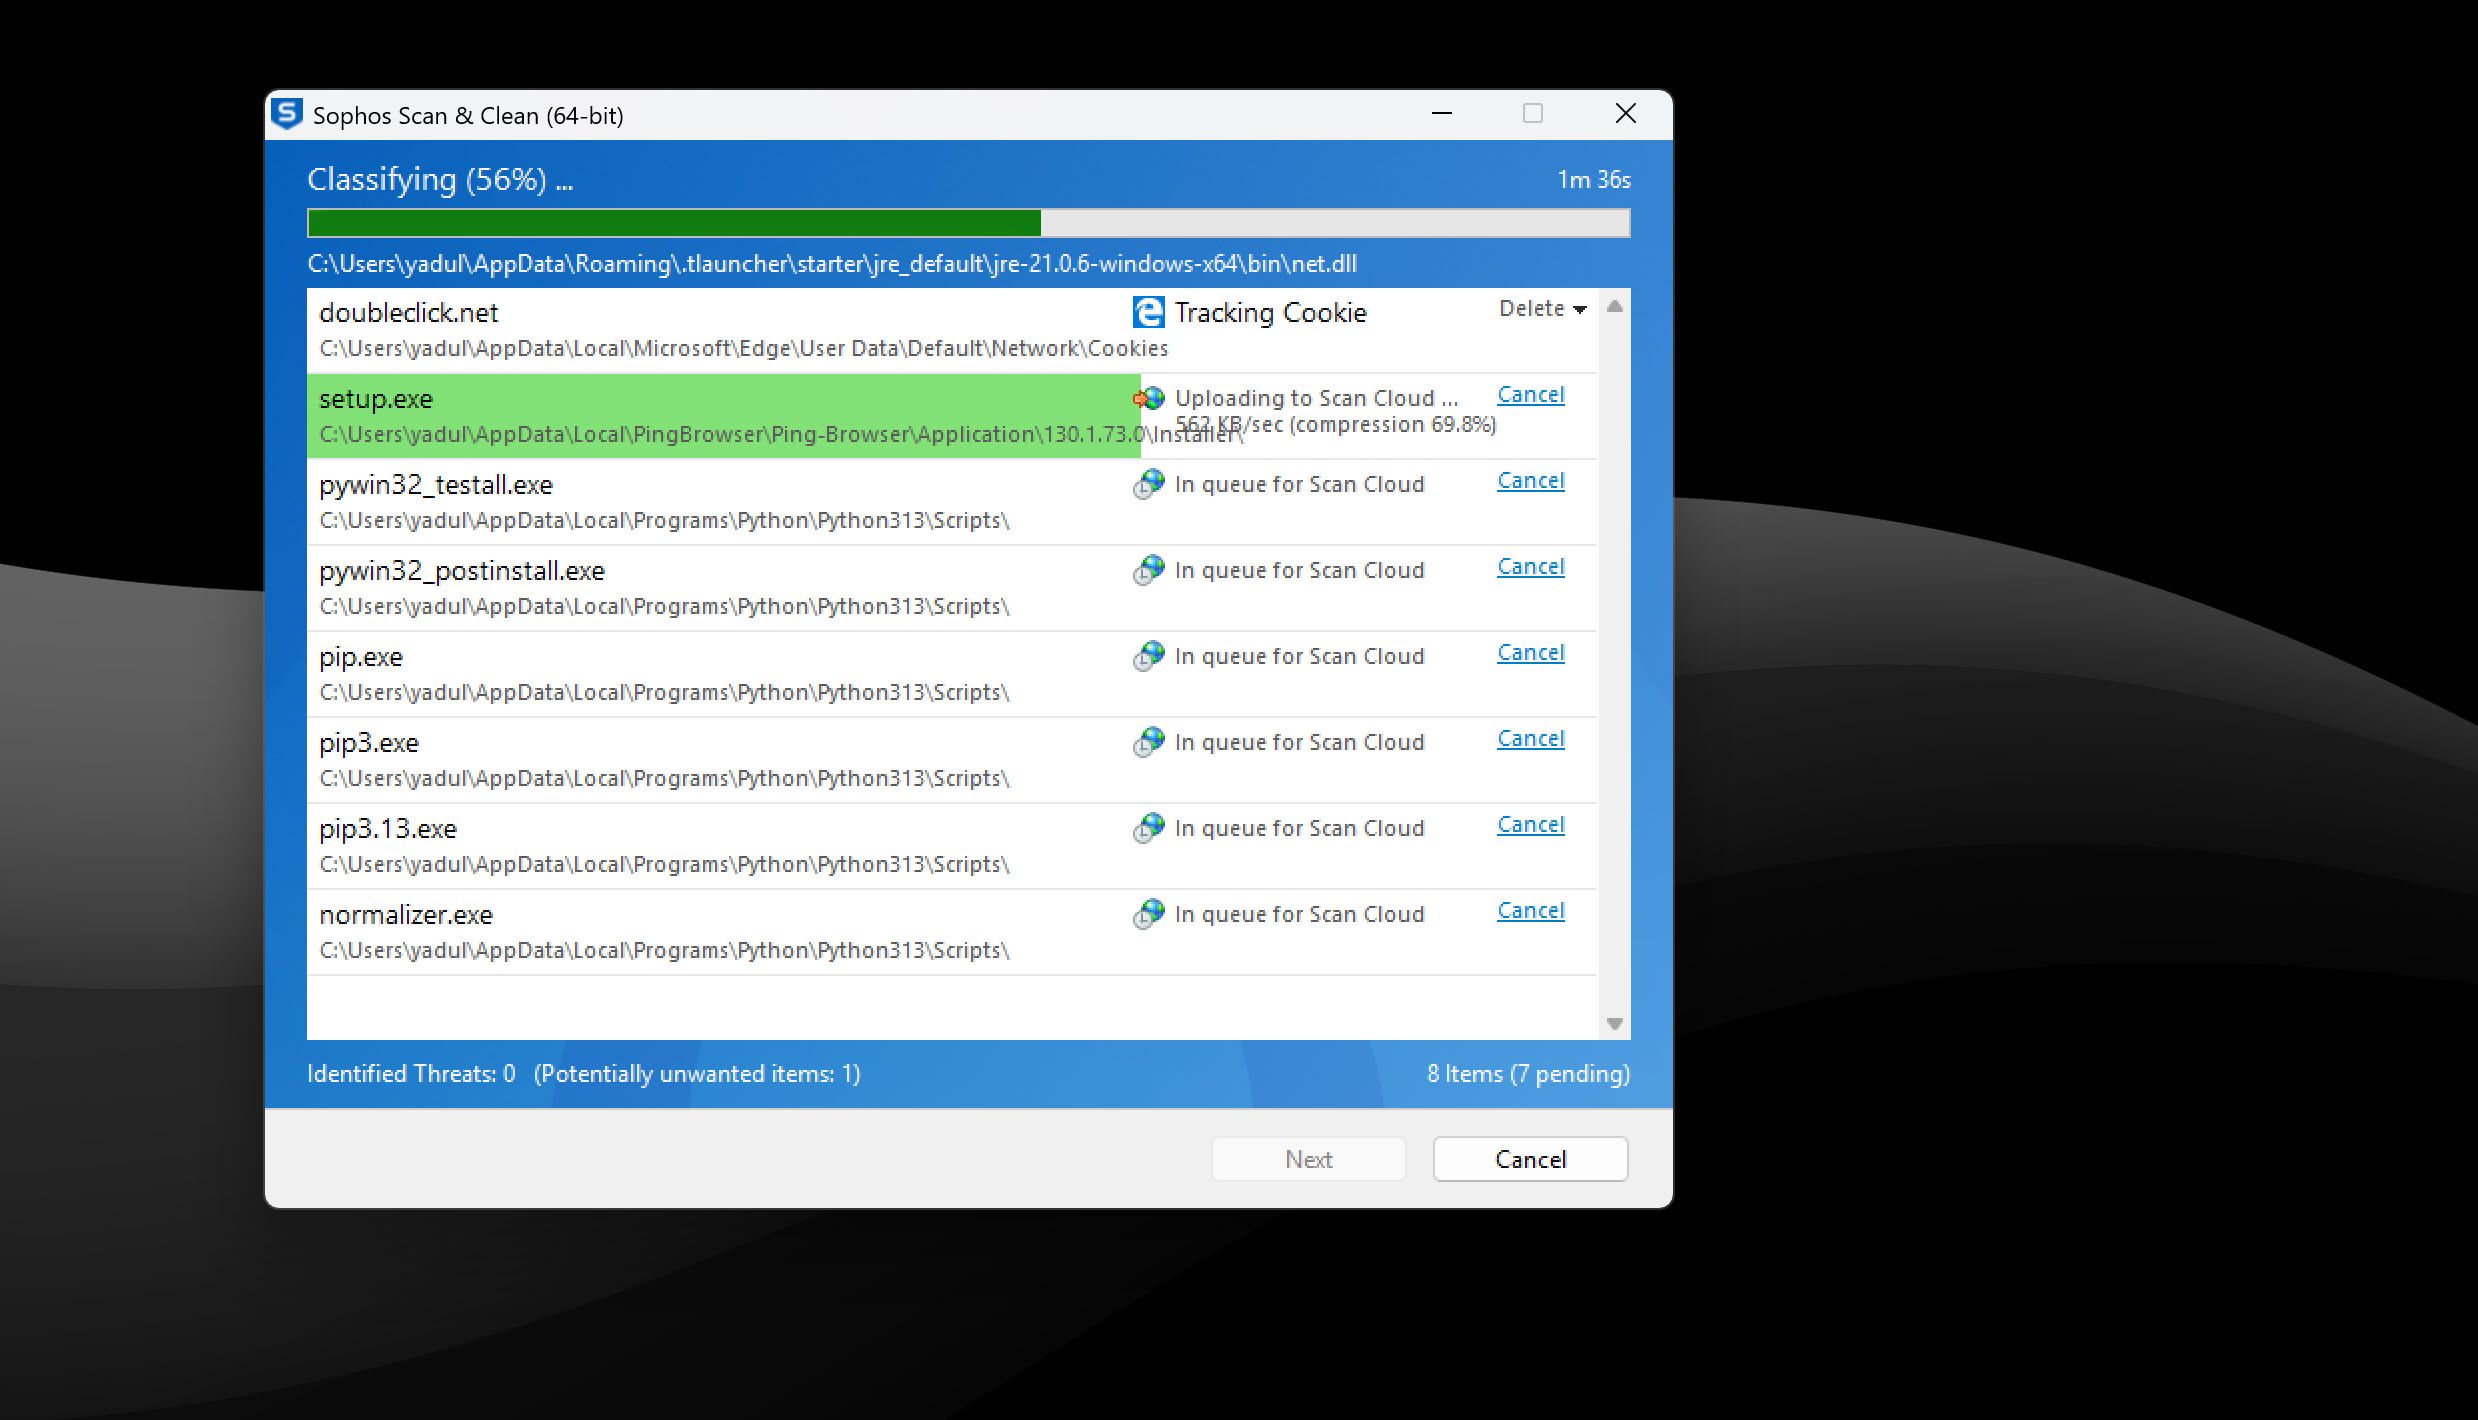
- Sophos Scan & Clean: A free virus removal scanning tool designed to remove zero-day malware, spyware, Trojans, rootkits, and other malicious programs that might evade real-time protection from a traditional antivirus.
Running these tools effectively requires some degree of technical sophistication. You’ll first have to create a bootable USB drive with your OS of choice and then move these tools to said drive. You can follow the same steps in the last section to create the drive; just use the new ISO that you downloaded for the specific tool.
When you need to fix a PC, simply boot using the USB drive and run your tool of choice to rid the system of any malware. Alternatively, if the infected PC can still boot into Windows, you can download these tools onto an external USB drive, plug it in, and run them on the infected machine.
I usually stick to Sophos when tackling malware on a PC. It’s a single executable file that you can run off a USB drive and is quite easy to use. Simply run the executable, accept the usage terms and conditions, and it’ll automatically start scanning the system for malicious files. The program will show you any threats or potentially unwanted programs as it scans the system, and you can choose to ignore or remove them on a per-case basis.
This approach is best used when you can’t simply wipe either your entire drive or a single partition where the malware infection resides. If you don’t have your data safely backed up, using standalone USB antimalware tools is your best shot at recovering your data.
2
Format Drives With a Bootable Linux USB
This method will mostly only work if you’re using Windows, especially with more than one storage drive. The idea is to boot into a Linux system to access the storage drives and format them before installing an OS and starting afresh.
Creating a bootable Linux USB drive is easy enough, and there are plenty of tools to create a bootable USB, whether you’re on Windows, Linux, or macOS. The difficult part is dealing with Linux’s storage management tools.
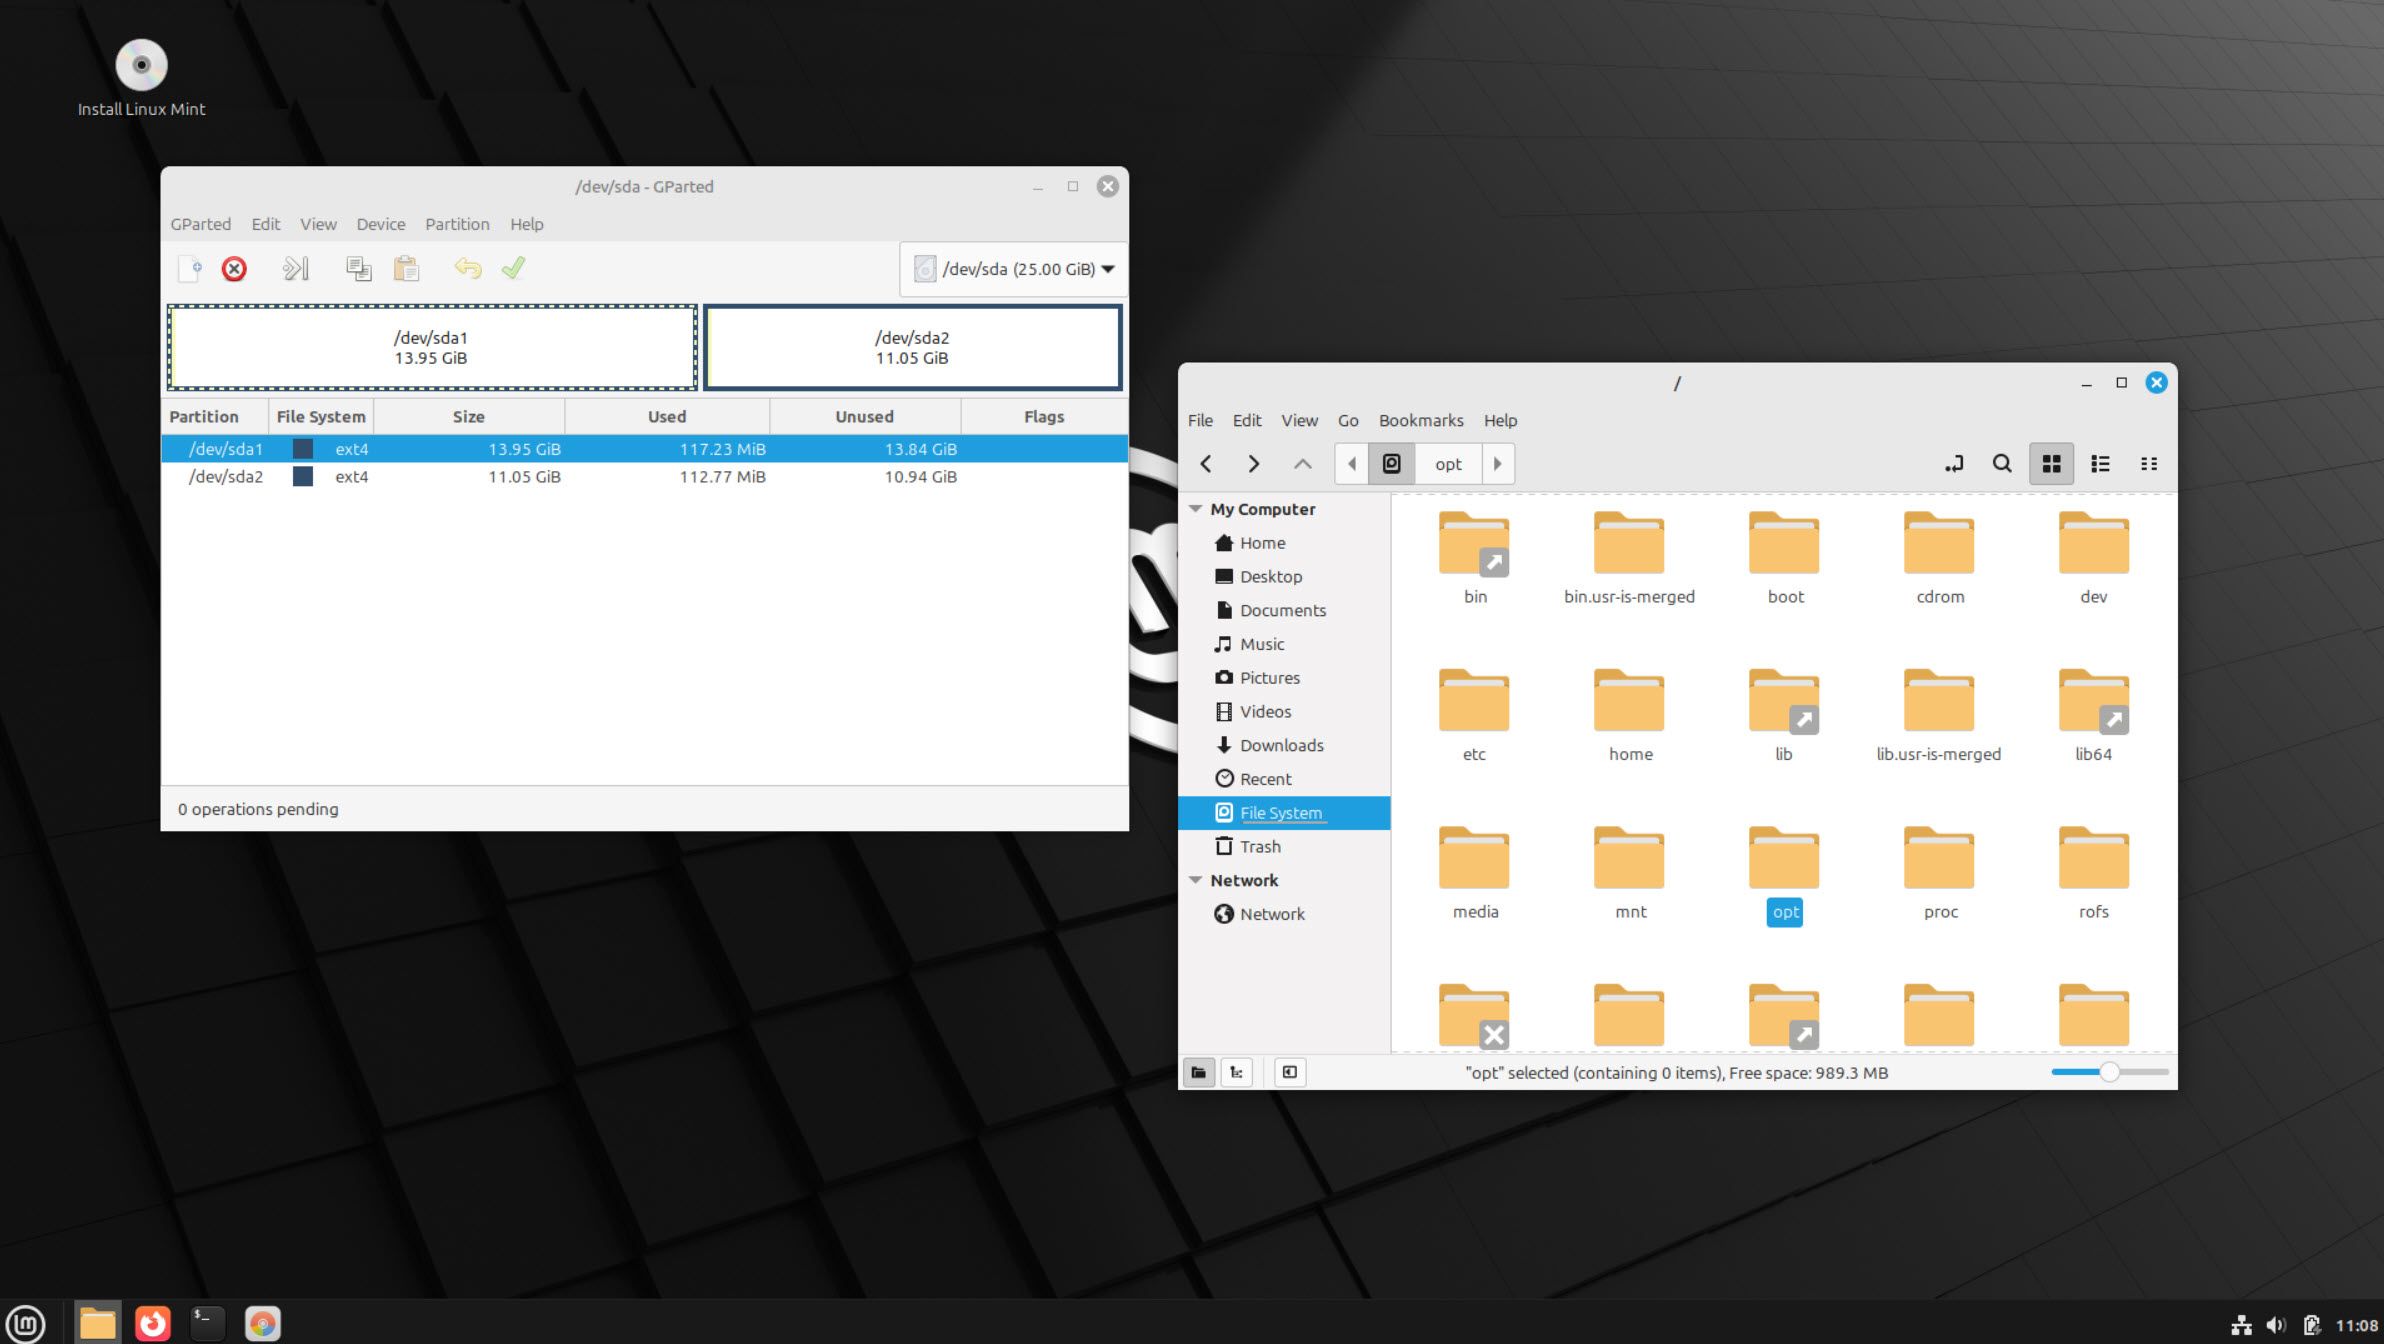
Command-line tools are the more direct approach for this purpose. However, if you want to save data and are only wiping a specific part of your storage drive, you need to be extremely careful to specify the right drive letter and number. Alternatively, you can also use GParted to wipe your drive. It’s a GUI-based Linux tool meant for managing storage drives, much like the Windows Disk Management tool.
Running the following command will cause irrevocable data loss. You do so at your own risk; please double-check any commands and understand the risks before committing.
Run shred /dev/sdx0/ in a terminal window, where x is the drive letter of the drive you want to wipe and 0 can be replaced with the partition number. This command will shred the whole disk or partition from the first to the last sector, meaning everything, including the partition table, will be erased. Note that running just /sdx/ will delete your entire drive, so make sure to pick the correct drive letter and partition.
The simplest way of finding the right drive is to access it within Linux and check for folders used by your Windows installation, such as Program Files, Windows, and ProgramData. If these folders are present on a partition or drive, it’s the drive where your Windows installation resides, and shredding it will remove your OS. As long as you’re using a different partition, you can safely back up data on the same drive. Just make sure to scan it before restoring to avoid any accidental infections.
This will result in data loss, but unless the malware is residing in your OS installation drive or partition, it avoids the hassle of an OS reinstall. You’ll also likely have to fix file paths and other broken functionality once you boot into your regular OS again.
1
Reinstall Your OS
Reinstalling your OS is by far the most foolproof method of eradicating malware or any other malicious software from your PC. The downside of this is that you’ll have to format your storage drive, meaning any data that isn’t backed up already will be lost in the process.
You can easily create a bootable USB to reinstall Windows using Microsoft’s Media Creation Tool. Creating a Linux bootable USB is a simple matter of picking the distro of your choice and creating a bootable USB with a tool like Rufus or Etcher.
This approach gives the malware nowhere to hide, as all the data on a storage drive is deleted and overwritten. There are new partitions, and even if the malware survives by some miracle, it can’t access any files, as the location for everything on your physical drive has changed.
Reinstalling your OS from scratch, setting it up, reinstalling all programs you use, and everything that you use daily can be a frustrating experience. However, it’s the only way you can be absolutely certain that your computer is safe from malware.
Each of the approaches mentioned here offers different levels of protection. Based on the malware strain that infected your PC, removing it can take anything from a simple scan to a full-blown reinstall.

